操作前默认已完成Ubuntu系统安装,本文实操环境为Ubuntu22.04LTS。
在Ubuntu中安装OpenClaw
在Ubuntu终端中基于官方链接给出的一键安装指令进行安装:
curl -fsSL https://openclaw.ai/install.sh | bash
一键安装过程中onboarding wizard操作可参考下表的操作:
| 配置项 | 操作 |
|---|---|
| I understand this is powerful and inherently risky. Continue? | 选择 “Yes” |
| Onboarding mode | 选择 “QuickStart” |
| Model/auth provider | 选择 “Skip for now”,后续可以配置 |
| Filter models by provider | 选择 “All providers” |
| Default model | 使用默认配置 |
| Select channel (QuickStart) | 选择 “Skip for now”,后续可以配置 |
| Configure skills now? (recommended) | 选择 “No”,后续可以配置 |
| Enable hooks? | 按空格键选中选项,按回车键进入下一步 |
| How do you want to hatch your bot? | 选择 “Hatch in TUI”,表示在终端中运行 |
安装完成后重启终端,或重启Ubuntu系统并重新打开终端,openclaw指令便可以运行。
模型申请与配置
我这里使用阿里云的Coding Plan套餐,套餐首月7.9元,简单使用很划算,可以选择不续费。
具体配置参考阿里云官方教程,这里截取关键所用的部分进行说明。
在订阅完成后,需要在OpenClaw 中配置 Coding Plan,具体步骤如下:
在终端中运行以下命令打开 Web UI,然后在Web UI的左侧菜单栏中选择Config>Raw;
openclaw dashboard
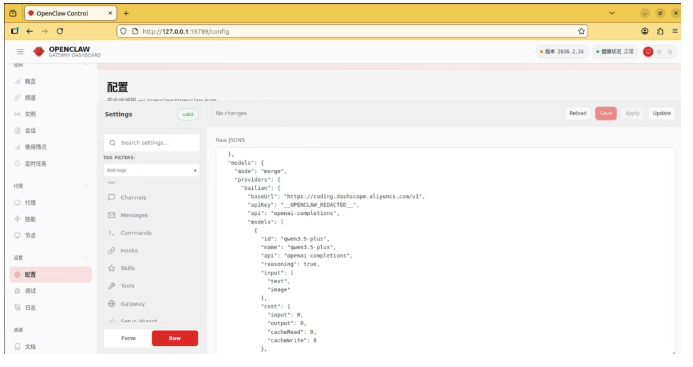
修改json配置文件:
在 JSON 根对象中加入如下:models 配置(如果已存在则替换)。将 YOUR_API_KEY 替换为自己的 Coding Plan API Key。注意新增对象与同级对象之间逗号隔开,不然会报错无法save保存。
"models": {
  "mode": "merge",
  "providers": {
    "bailian": {
      "baseUrl": "https://coding.dashscope.aliyuncs.com/v1",
      "apiKey": "YOUR_API_KEY",
      "api": "openai-completions",
      "models": [
        {
          "id": "qwen3.5-plus",
          "name": "qwen3.5-plus",
          "reasoning": false,
          "input": ["text", "image"],
          "cost": { "input": 0, "output": 0, "cacheRead": 0, "cacheWrite": 0 },
          "contextWindow": 1000000,
          "maxTokens": 65536
        },
        {
          "id": "qwen3-max-2026-01-23",
          "name": "qwen3-max-2026-01-23",
          "reasoning": false,
          "input": ["text"],
          "cost": { "input": 0, "output": 0, "cacheRead": 0, "cacheWrite": 0 },
          "contextWindow": 262144,
          "maxTokens": 65536
        },
        {
          "id": "qwen3-coder-next",
          "name": "qwen3-coder-next",
          "reasoning": false,
          "input": ["text"],
          "cost": { "input": 0, "output": 0, "cacheRead": 0, "cacheWrite": 0 },
          "contextWindow": 262144,
          "maxTokens": 65536
        },
        {
          "id": "qwen3-coder-plus",
          "name": "qwen3-coder-plus",
          "reasoning": false,
          "input": ["text"],
          "cost": { "input": 0, "output": 0, "cacheRead": 0, "cacheWrite": 0 },
          "contextWindow": 1000000,
          "maxTokens": 65536
        },
        {
          "id": "MiniMax-M2.5",
          "name": "MiniMax-M2.5",
          "reasoning": false,
          "input": ["text"],
          "cost": { "input": 0, "output": 0, "cacheRead": 0, "cacheWrite": 0 },
          "contextWindow": 1000000,
          "maxTokens": 65536

        },
        {

          "id": "glm-5",
          "name": "glm-5",
          "reasoning": false,
          "input": ["text"],
          "cost": { "input": 0, "output": 0, "cacheRead": 0, "cacheWrite": 0 },
          "contextWindow": 202752,
          "maxTokens": 16384
        },
        {
          "id": "glm-4.7",
          "name": "glm-4.7",
          "reasoning": false,
          "input": ["text"],
          "cost": { "input": 0, "output": 0, "cacheRead": 0, "cacheWrite": 0 },
          "contextWindow": 202752,
          "maxTokens": 16384
        },
        {
          "id": "kimi-k2.5",
          "name": "kimi-k2.5",
          "reasoning": false,
          "input": ["text", "image"],
          "cost": { "input": 0, "output": 0, "cacheRead": 0, "cacheWrite": 0 },
          "contextWindow": 262144,
          "maxTokens": 32768
        }
      ]
    }
  }
}
找到 agents.defaults 对象,并替换或添加以下两个字段。注意新增对象与同级对象之间逗号隔开,不然会报错无法save。这里默认优先使用qwen3.5-plus模型,实际使用时可以使用命令修改,可以参考第四部分。
"model": {
  "primary": "bailian/kimi-k2.5"
},
"models": {
  "bailian/qwen3.5-plus": {},
  "bailian/qwen3-max-2026-01-23": {},
  "bailian/qwen3-coder-next": {},
  "bailian/qwen3-coder-plus": {},
  "bailian/MiniMax-M2.5": {},
  "bailian/glm-5": {},
  "bailian/glm-4.7": {},
  "bailian/kimi-k2.5": {}
}
粘贴完成后,先单击右上角Save保存,然后单击Update来使配置生效。
等待update完成后,打开一个新的终端,有两种方式启动OpenClaw执行:
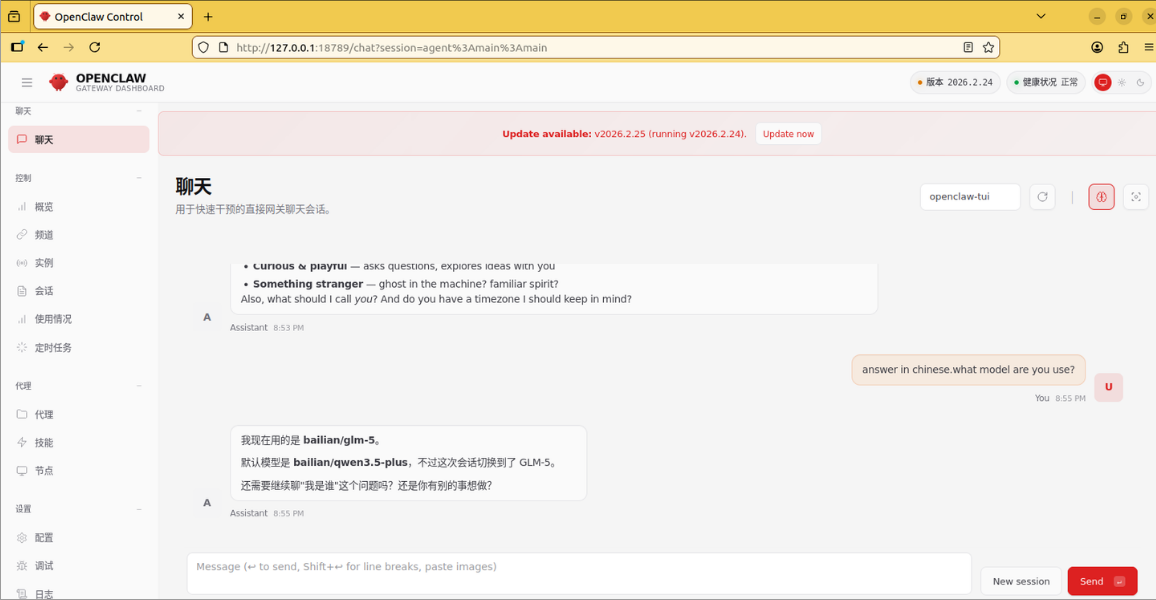
如果后续在Web UI中执行,在命令行输入以下指令:
openclaw dashboard
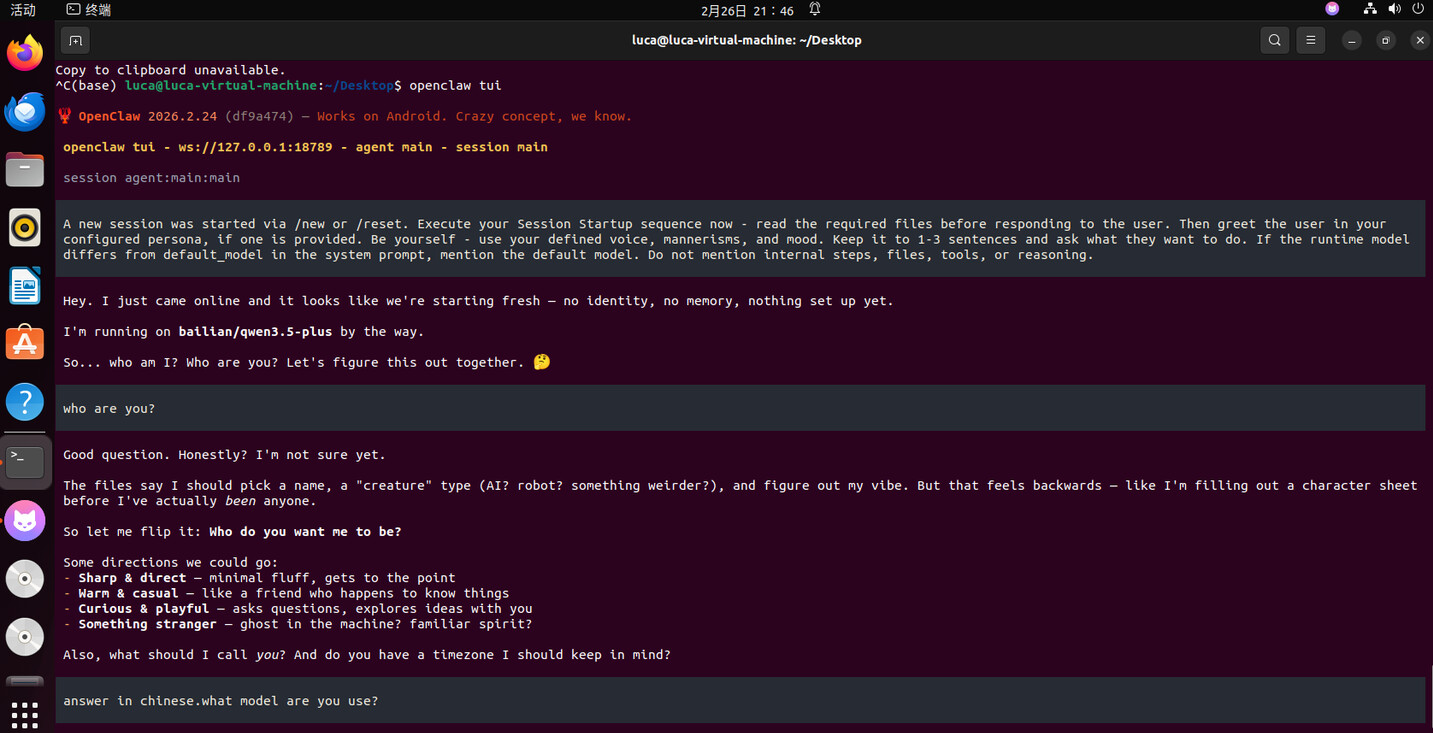
如果后续在终端UI中执行,在命令行输入以下指令:
openclaw tui
OpenClaw Channels配置飞书
目前飞书已经被引入到OpenClaw的Channels配置中,可以直接在终端启动配置:
openclaw config
| 操作选项 | 指令 |
|---|---|
| Where will the Gateway run? | 选择“Local (this machine)” |
| Select sections to configure | 选择“Channels” |
| Channels | 选择“Configure/link“ |
| Select a channel | 选择”Feishu/Lark (飞书)“ |
| Install feishu plugin? | Download from npm (@openclaw/feishu) |
此时需要在飞书开发平台创建一个机器人。
1.打开飞书开放平台(飞书开放平台
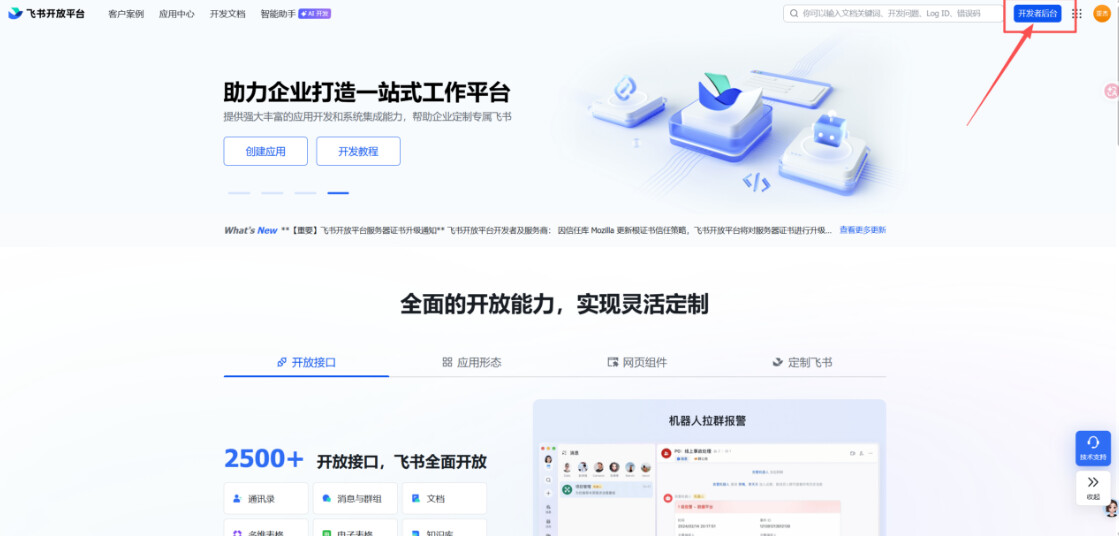
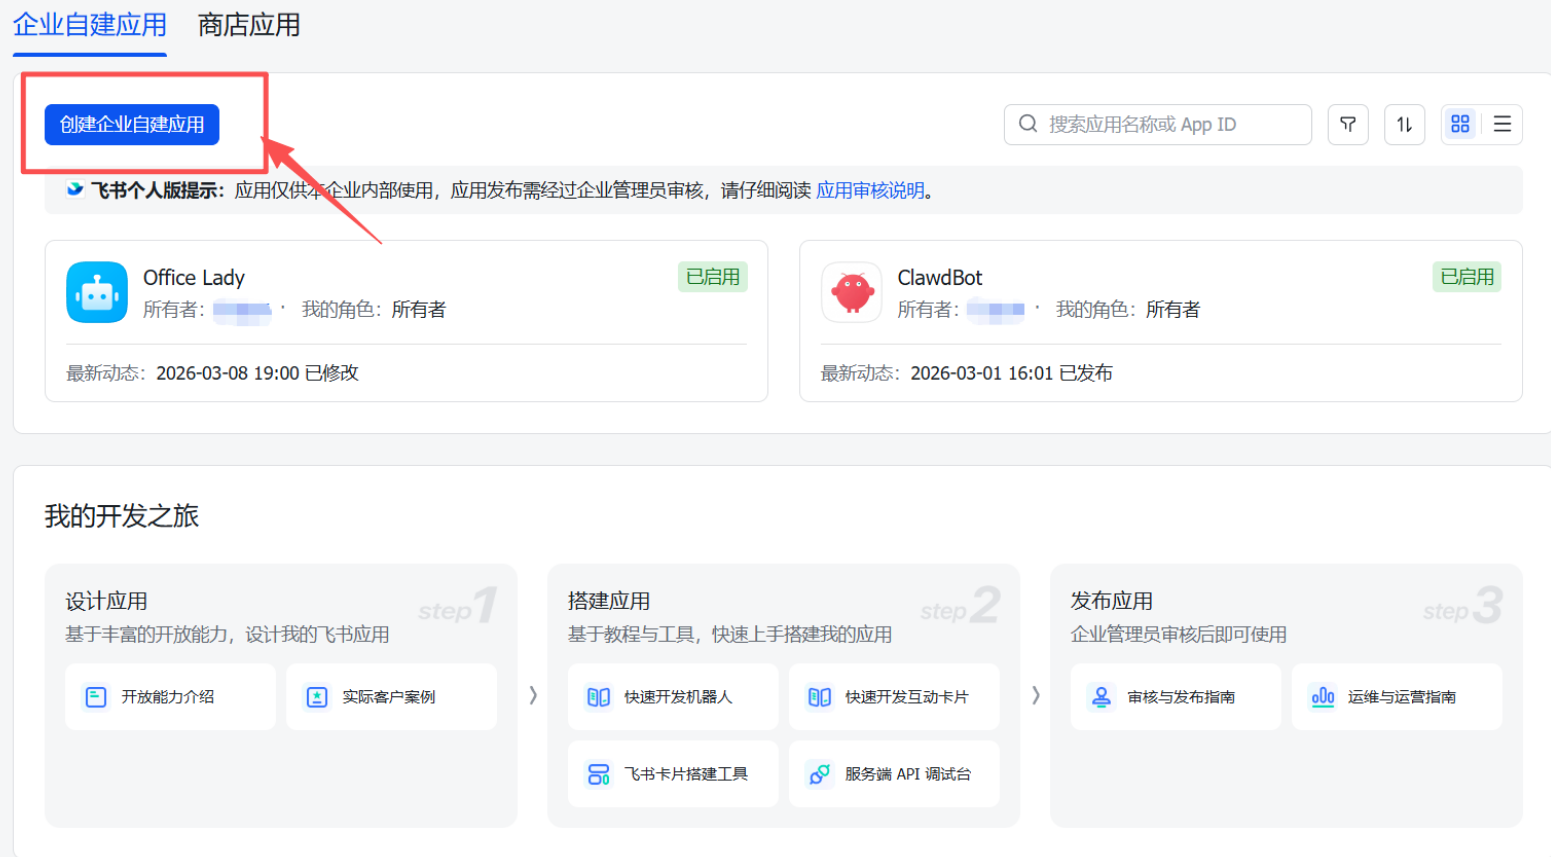
2.没有飞书账号的可以用手机号注册一个,创建个人用户即可,然后选择创建企业自建应用;
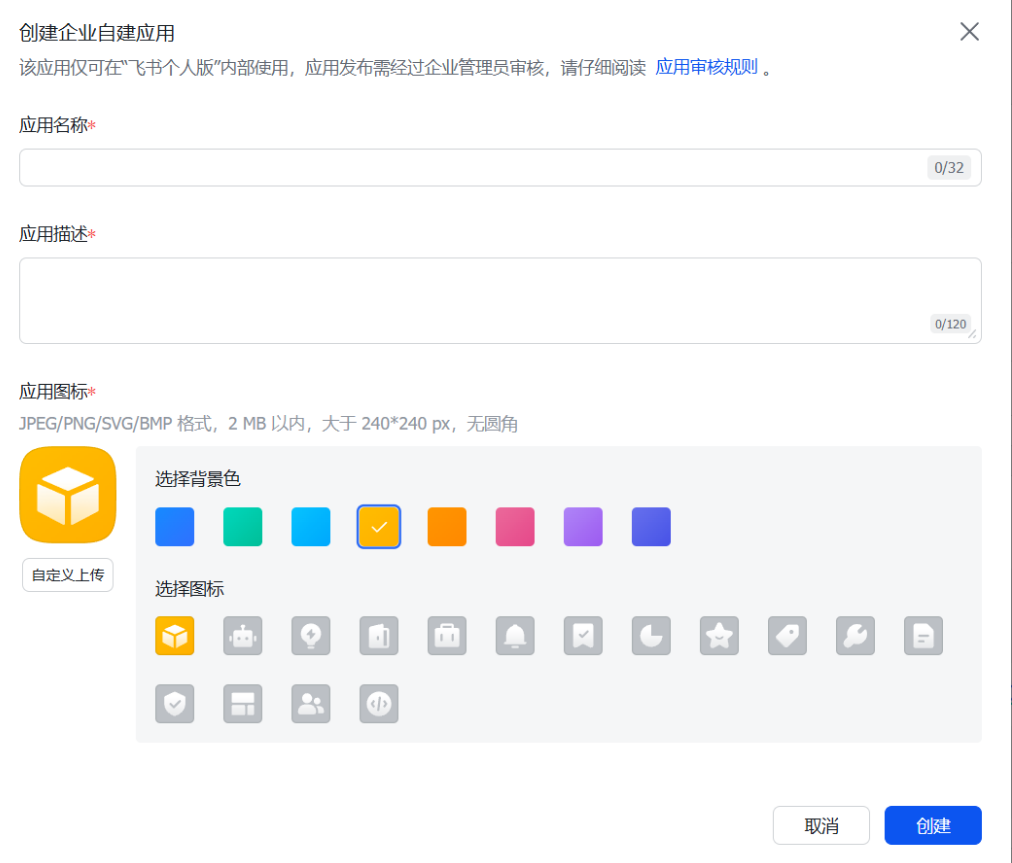
3.在这里输入你的应用名称,简单的描述,设置它的图标,完全自定义;
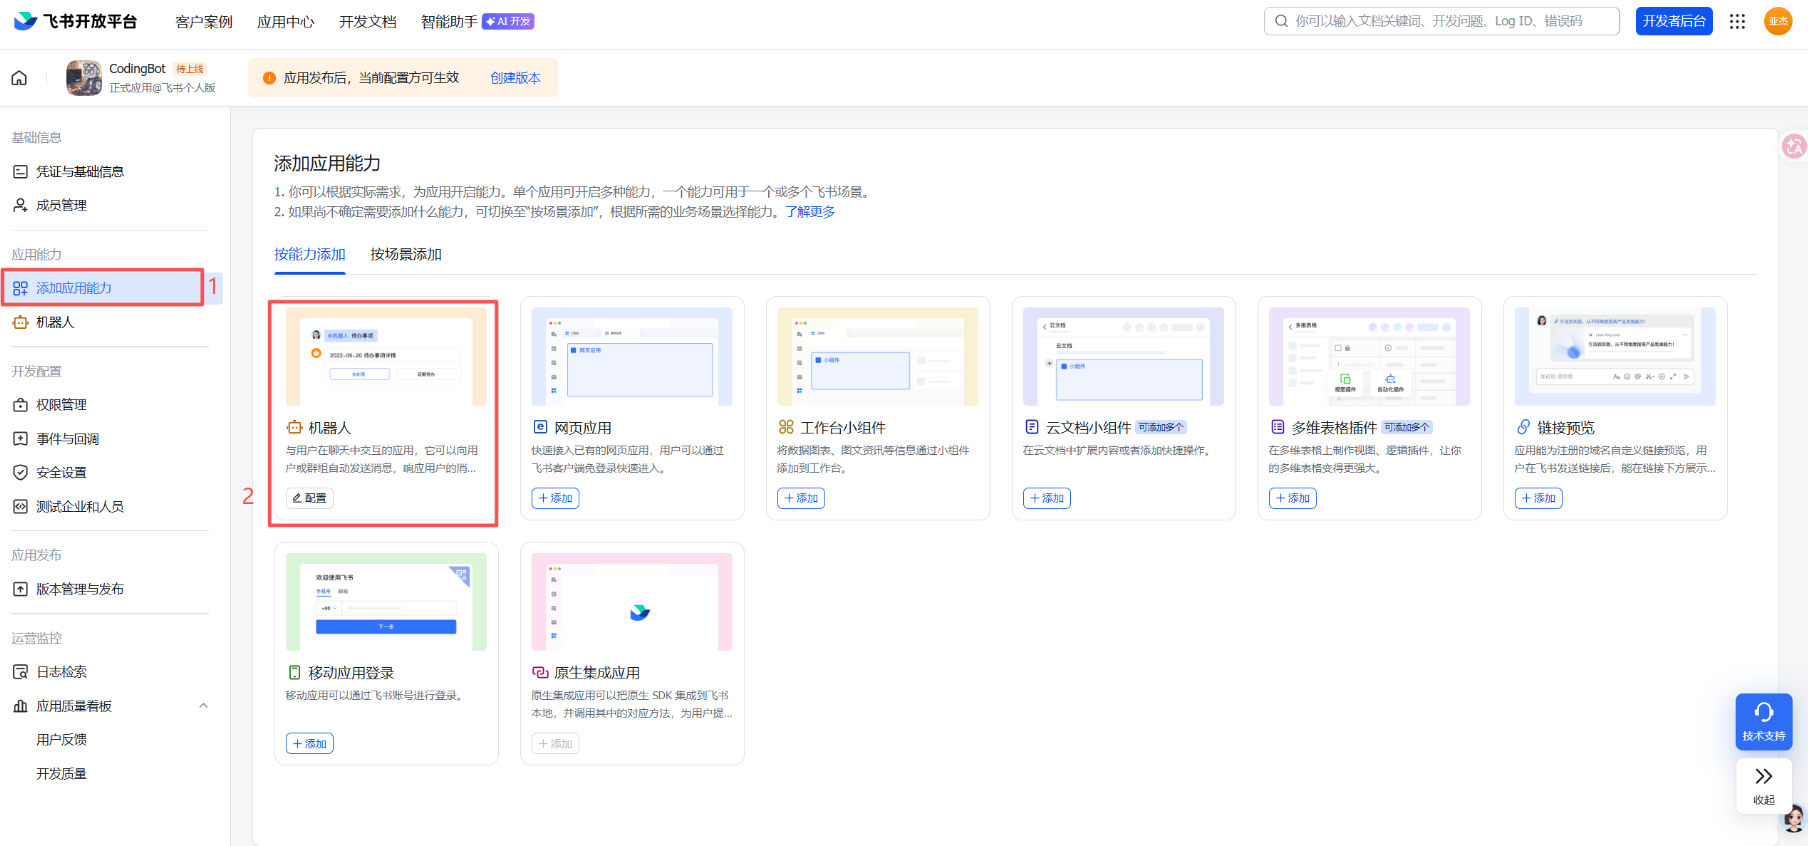
4.选择添加应用能力,选择机器人->添加;
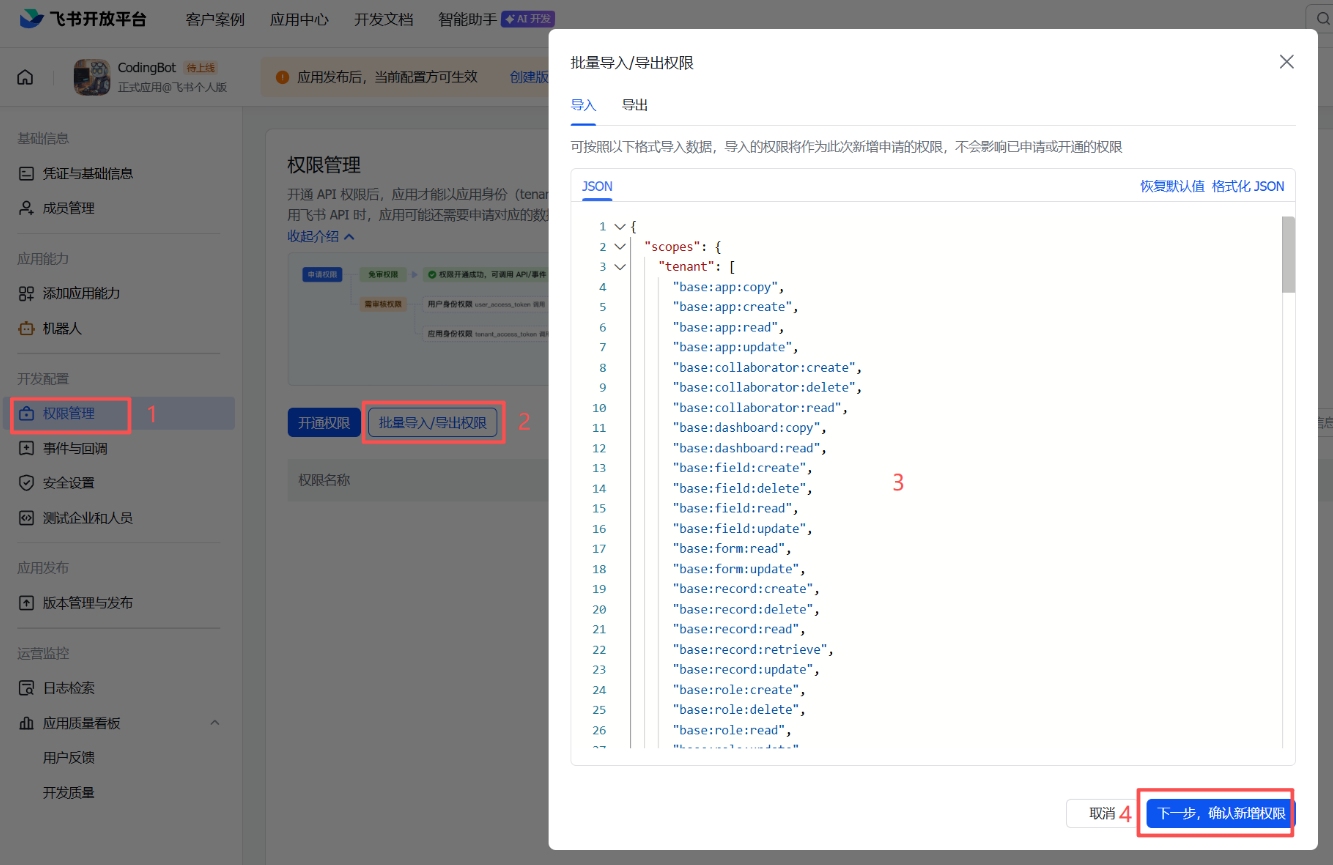
5.选择权限管理->批量导入/导出权限->粘贴以下权限->下一步,确认新增权限->申请开通->确认;
{
  "scopes": {
    "tenant": [
      "base:app:copy",
      "base:app:create",
      "base:app:read",
      "base:app:update",
      "base:collaborator:create",
      "base:collaborator:delete",
      "base:collaborator:read",
      "base:dashboard:copy",
      "base:dashboard:read",
      "base:field:create",
      "base:field:delete",
      "base:field:read",
      "base:field:update",
      "base:form:read",
      "base:form:update",
      "base:record:create",
      "base:record:delete",
      "base:record:read",
      "base:record:retrieve",
      "base:record:update",
      "base:role:create",
      "base:role:delete",
      "base:role:read",
      "base:role:update",
      "base:table:create",
      "base:table:delete",
      "base:table:read",
      "base:table:update",
      "base:view:read",
      "base:view:write_only",
      "bitable:app",
      "bitable:app:readonly",
      "board:whiteboard:node:create",
      "board:whiteboard:node:delete",
      "board:whiteboard:node:read",
      "board:whiteboard:node:update",
      "contact:contact.base:readonly",
      "contact:user.base:readonly",
      "contact:user.employee_id:readonly",
      "contact:user.employee_number:read",
      "contact:user.id:readonly",
      "docs:doc",
      "docs:doc:readonly",
      "docs:document.comment:create",
      "docs:document.comment:read",
      "docs:document.comment:update",
      "docs:document.comment:write_only",
      "docs:document.content:read",
      "docs:document.media:download",
      "docs:document.media:upload",
      "docs:document.subscription",
      "docs:document.subscription:read",
      "docs:document:copy",
      "docs:document:export",
      "docs:document:import",
      "docs:event.document_deleted:read",
      "docs:event.document_edited:read",
      "docs:event.document_opened:read",
      "docs:event:subscribe",
      "docs:permission.member",
      "docs:permission.member:auth",
      "docs:permission.member:create",
      "docs:permission.member:delete",
      "docs:permission.member:readonly",
      "docs:permission.member:retrieve",
      "docs:permission.member:transfer",
      "docs:permission.member:update",
      "docs:permission.setting",
      "docs:permission.setting:read",
      "docs:permission.setting:readonly",
      "docs:permission.setting:write_only",
      "docx:document",
      "docx:document.block:convert",
      "docx:document:create",
      "docx:document:readonly",
      "drive:drive",
      "drive:drive.metadata:readonly",
      "drive:drive.search:readonly",
      "drive:drive:readonly",
      "drive:drive:version",
      "drive:drive:version:readonly",
      "drive:export:readonly",
      "drive:file",
      "drive:file.like:readonly",
      "drive:file.meta.sec_label.read_only",
      "drive:file:download",
      "drive:file:readonly",
      "drive:file:upload",
      "drive:file:view_record:readonly",
      "event:ip_list",
      "im:app_feed_card:write",
      "im:biz_entity_tag_relation:read",
      "im:biz_entity_tag_relation:write",
      "im:chat",
      "im:chat.access_event.bot_p2p_chat:read",
      "im:chat.announcement:read",
      "im:chat.announcement:write_only",
      "im:chat.chat_pins:read",
      "im:chat.chat_pins:write_only",
      "im:chat.collab_plugins:read",
      "im:chat.collab_plugins:write_only",
      "im:chat.managers:write_only",
      "im:chat.members:bot_access",
      "im:chat.members:read",
      "im:chat.members:write_only",
      "im:chat.menu_tree:read",
      "im:chat.menu_tree:write_only",
      "im:chat.moderation:read",
      "im:chat.tabs:read",
      "im:chat.tabs:write_only",
      "im:chat.top_notice:write_only",
      "im:chat.widgets:read",
      "im:chat.widgets:write_only",
      "im:chat:create",
      "im:chat:delete",
      "im:chat:moderation:write_only",
      "im:chat:operate_as_owner",
      "im:chat:read",
      "im:chat:readonly",
      "im:chat:update",
      "im:datasync.feed_card.time_sensitive:write",
      "im:message",
      "im:message.group_at_msg:readonly",
      "im:message.group_msg",
      "im:message.p2p_msg:readonly",
      "im:message.pins:read",
      "im:message.pins:write_only",
      "im:message.reactions:read",
      "im:message.reactions:write_only",
      "im:message.urgent",
      "im:message.urgent.status:write",
      "im:message.urgent:phone",
      "im:message.urgent:sms",
      "im:message:readonly",
      "im:message:recall",
      "im:message:send_as_bot",
      "im:message:send_multi_depts",
      "im:message:send_multi_users",
      "im:message:send_sys_msg",
      "im:message:update",
      "im:resource",
      "im:tag:read",
      "im:tag:write",
      "im:url_preview.update",
      "im:user_agent:read",
      "sheets:spreadsheet",
      "sheets:spreadsheet.meta:read",
      "sheets:spreadsheet.meta:write_only",
      "sheets:spreadsheet:create",
      "sheets:spreadsheet:read",
      "sheets:spreadsheet:readonly",
      "sheets:spreadsheet:write_only",
      "space:document.event:read",
      "space:document:delete",
      "space:document:move",
      "space:document:retrieve",
      "space:document:shortcut",
      "space:folder:create",
      "wiki:member:create",
      "wiki:member:retrieve",
      "wiki:member:update",
      "wiki:node:copy",
      "wiki:node:create",
      "wiki:node:move",
      "wiki:node:read",
      "wiki:node:retrieve",
      "wiki:node:update",
      "wiki:setting:read",
      "wiki:setting:write_only",
      "wiki:space:read",
      "wiki:space:retrieve",
      "wiki:space:write_only",
      "wiki:wiki",
      "wiki:wiki:readonly"
    ],
    "user": [
      "contact:user.employee_id:readonly"
    ]
  }
}
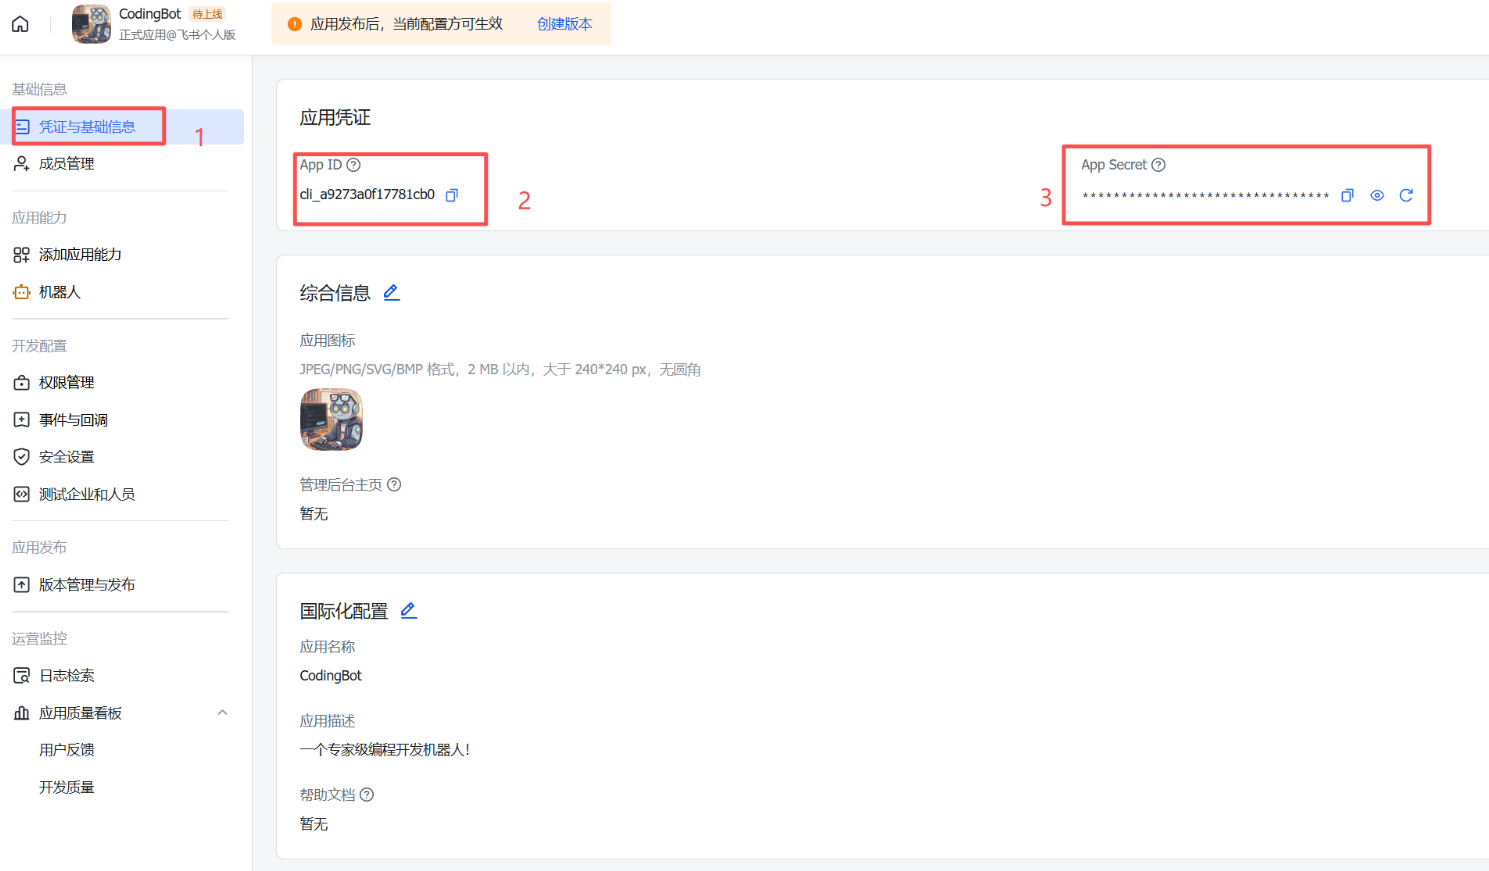
- 然后点击凭证与基础信息,将这里的App ID和App Secret复制到Ubuntu命令行中,完成OpenClaw与飞书应用的链接;
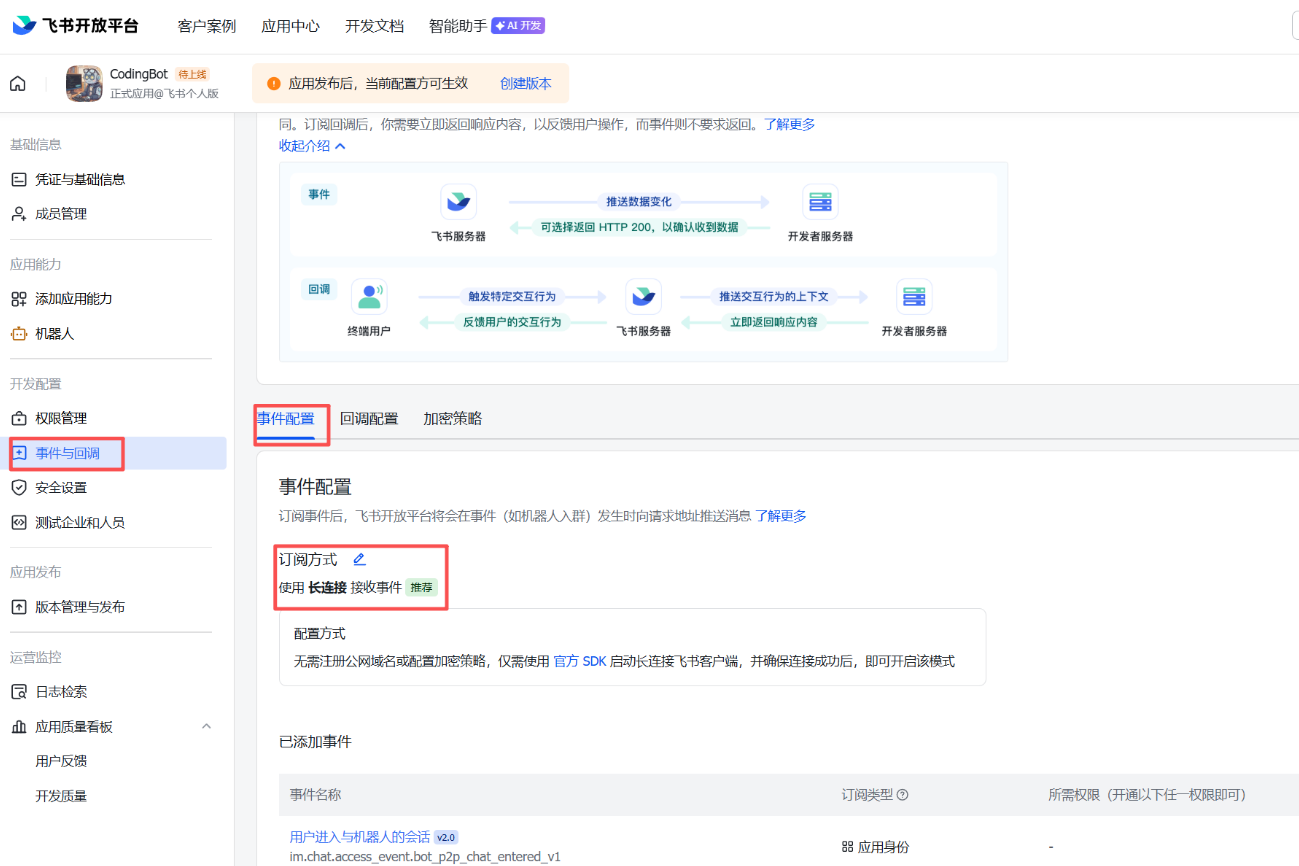
7.然后点击事件与订阅->事件配置->使用长连接接收事件,然后点击右侧添加事件,将消息与群组里面的全选;
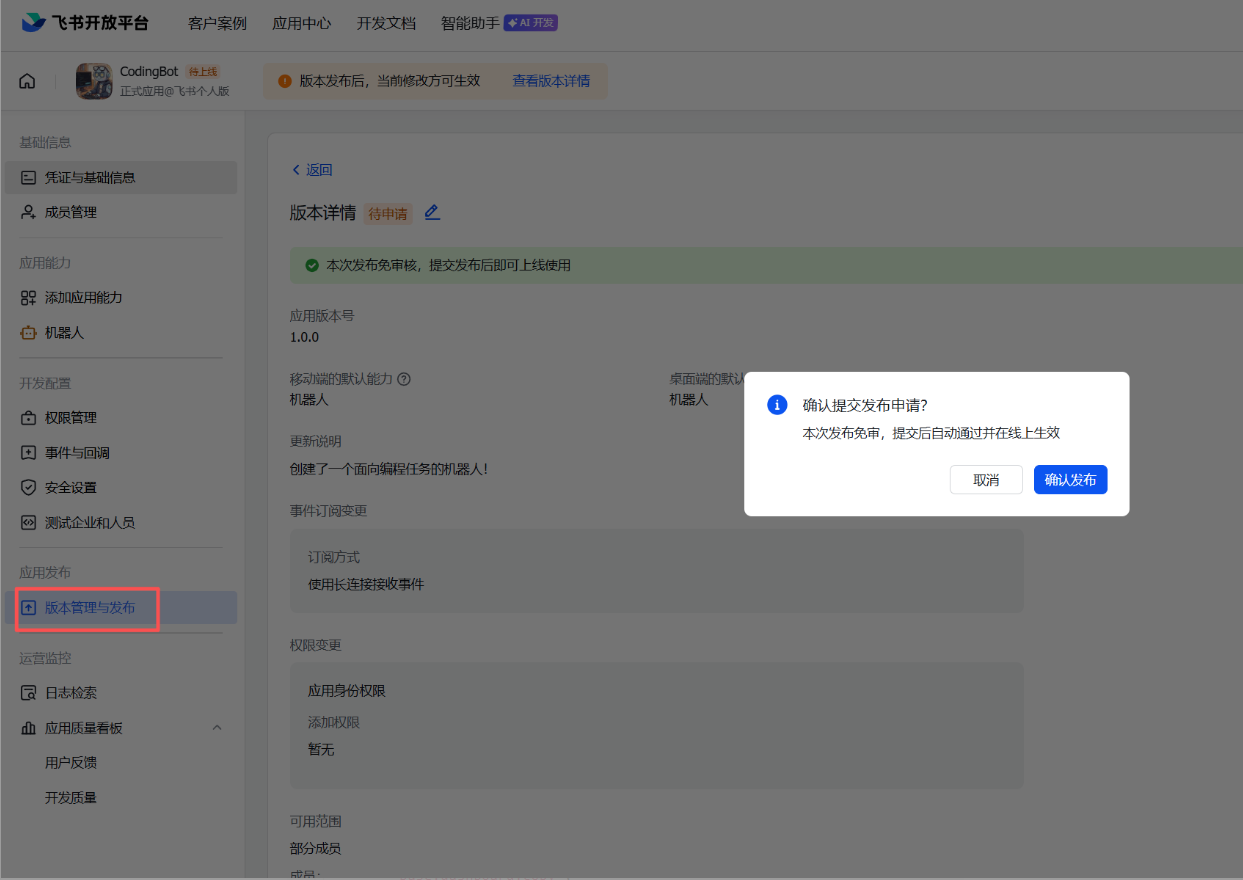
8.然后点击版本管理与发布,写入机器人的版本信息,保存后确认发布;
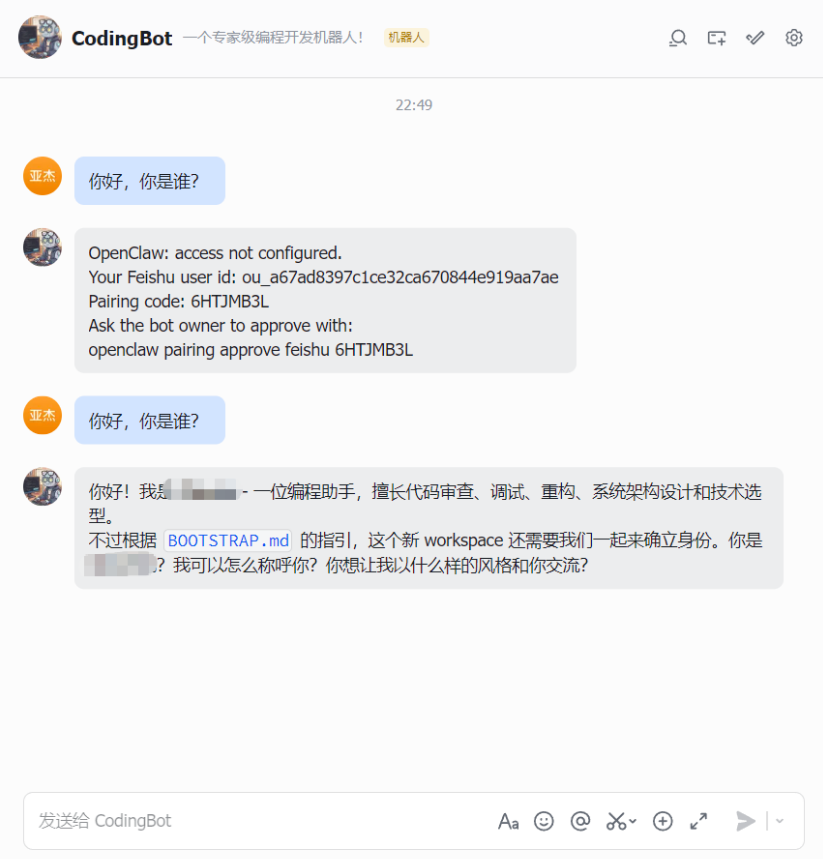
9.打开飞书,跟它打招呼,这时候提示没有配对,复制最后一行:
openclaw pairing approve feishu 6HTJMB3L
粘贴到Ubuntu 命令行并回车,OpenClaw批准飞书接入配对。
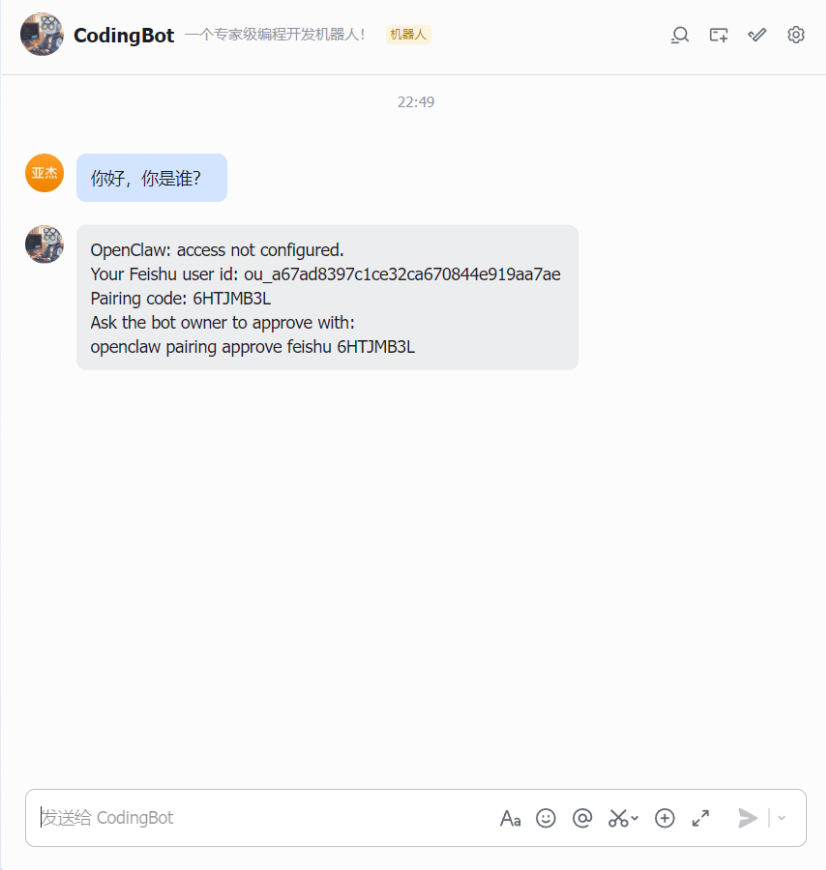
10.尝试再打一次招呼,它如果回复你一个小表情,然后回复打招呼内容,就代表配置成功了!
看到这里代表配置已经完成了,国内最大OpenClaw Skills商店:https://hub.cocoloop.cn/